| DIY Compact Tractor Front End Loader Project | ||||||||||||||||||
| When I purchased my compact tractor one of the things I wanted for it was a front end loader. Our yard could stand some landscaping and I have no desire to get out and do it with a pick, shovel and wheel barrow. I am building what I call the "keel" first. I'm not sure what it is properly called but it is the part that bolts onto the tractor and the removable parts of the front end loader attach to it. This "keel" is specifically designed for a Mitsubishi D1550 compact tractor but should also fit a Satoh Buck S470. I cover the keel in the first 3 episodes and then move on to the detachable portion of the front end loader which should be suitable for mounting on any similar compact tractor. The design phase of the front end loader has gone through several iterations including 3 or 4 clean sheet of paper restarts. I think I have got it right this time and I am taking the unusual step (for me) of starting to upload the videos before the project is finished. If it fails you will get to see it as it happens. The fact is that the build has been underway for a while in between other projects and if I can get a good run at it I think I should have it finished in a month or so. The reality is that, as I type this I am working 12x7 at my real job and will be for about the next week. As with all hobbies how much time I can devote to it depends on the vagrancies of life. The complete play lists of all my projects are available in full HD on Youtube |
||||||||||||||||||
| Other than the metal, parts can be found here: | ||||||||||||||||||
| 1 required. I prefer the single joystick but there is a two stick model if you prefer. |
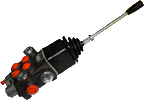 |
Hydraulic joystick on EBay AU | Hydraulic joystick on EBay CA | |||||||||||||||
| Hydraulic joystick on EBay US | Hydraulic joystick on EBay UK | |||||||||||||||||
| 1 required You can combine postage if you order it with the controller above. |
 |
Power beyond fitting on EBay AU | Power beyond fitting on EBay CA | |||||||||||||||
| Power beyond fitting on EBay US | Power beyond fitting on EBay UK | |||||||||||||||||
| Two required to lift the arms. | 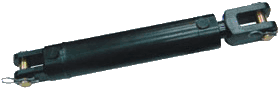 |
Primary Hydraulic Ram on EBay AU | Primary Hydraulic Ram on EBay CA | |||||||||||||||
| Primary Hydraulic Ram on EBay US | Primary Hydraulic Ram on EBay UK | |||||||||||||||||
| Two required to tip the bucket. | 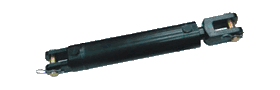 |
Secondary Hydraulic Ram on EBay AU | Secondary Hydraulic Ram on EBay CA | |||||||||||||||
| Secondary Hydraulic Ram on EBay US | Secondary Hydraulic Ram on EBay UK | |||||||||||||||||
| Much cheaper to buy a box if you have a use for them. The box contains all the lynch pins listed below. |
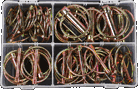 |
50pc box of lynch pins on EBay AU | 50pc box of lynch pins on EBay CA | |||||||||||||||
| 50pc box of lynch pins on EBay US | 50pc box of lynch pins on EBay UK | |||||||||||||||||
| 4 required to retain the 1 1/4" (32mm) pins | 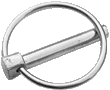 |
6mm lynch pins on EBay AU | 6mm lynch pins on EBay CA | |||||||||||||||
| 6mm lynch pins on EBay US | 6mm lynch pins on EBay UK | |||||||||||||||||
| 6 required to retain the 1" (25mm) pins | |
5mm lynch pins on EBay AU | 5mm lynch pins on EBay CA | |||||||||||||||
| 5mm lynch pins on EBay US | 5mm lynch pins on EBay UK | |||||||||||||||||
| 10 required to retain the 7/8" (22mm) and 3/4" (19mm) pins Be carful to order the correct size for the pins. |
 |
R clips on EBay AU | R clips on EBay CA | |||||||||||||||
| R clips on EBay US | R clips on EBay UK | |||||||||||||||||
| This burr grinder was absolutely invaluable throughout the construction. | ||||||||||||||||||
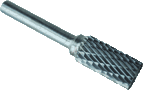 |
12mm Burr grinder on EBay AU | 12mm Burr grinder Ram on EBay CA | ||||||||||||||||
| 12mm Burr grinder Ram on EBay US | 12mm Burr grinder Ram on EBay UK | |||||||||||||||||
| Project Videos: | ||||||||||||||||||
| Starting the keel build. | I am building what I call the "keel" first. I'm not sure what it is properly called but it is the part that bolts onto the tractor and the removable parts of the front end loader attach to it. This "keel" is specifically designed for a Mitsubishi D1550 compact tractor but should also fit a Satoh Buck S470. I had expected to cover the build of the keel in 2 episodes but I can now see it will run for 3 and each episode is a bit longer than I normally aim for. Once we have the keel built I will move on to the detachable portion of the front end loader and that part will be suitable for mounting on any similar compact tractor. |
|||||||||||||||||
| In this episode I finish building what I call the "keel". I'm not sure what it is properly called but it is the part that bolts onto the tractor and the removable parts of the front end loader attach to it. This "keel" is specifically designed for a Mitsubishi D1550 compact tractor but should also fit a Satoh Buck S470. | In this episode I build the tower units which mount the arms and are dismountable from the keel posts. These towers and the remainder of the build should be compatible with many compact tractors. | |||||||||||||||||
| In this episode I build the quick attach units which mount onto the ends of the arms and enable the rapid attachment and detachment of buckets, forks and other attachments. These quick attach units and the remainder of the build should be compatible with many compact tractors. | In this episode I start building the arms. I had thought one episode would cover that but it turns out I need two. Perhaps I talk too much. On that subject I shot this over several afternoons so I apologise if there is some repetition but sometimes it's hard to remember what I said yesterday and I think it is better to repeat it than miss saying it all together. I wanted arms like the commercially built ones so I fabricated them using sheet steel rather than the SHS that most DIY projects use. These arms and the remainder of the build should be compatible with many compact tractors. |
|||||||||||||||||
| In this episode I continue building the arms. I had thought one episode would cover it, then I thought two would do but now I see it will cover at least three. My only excuse for the time consuming construction is that I wanted arms like the commercially built ones so I fabricated them using sheet steel rather than the SHS that most DIY projects use. |
As expected I am still working on the arms in this video and I am still failing to forfill my estimate of completion. I didn't manage to get them finished in this video so we will run into the next video a little in order to finish them but hopefully not too much. |
|||||||||||||||||
| Circumstances have conspired to ensure that I was unable to make any progress on the arms this week so I have uploaded a video of the bucket construction. I don't finish the bucket in this video either, I still have to weld on the quick attach fittings so that will come in a later video. |
In this episode I finally get the arms mounted on the tractor, not finished mind you but I regard it as a significant milestone. It doesn't appear like a lot of actual work was done in a week but a lot of it was behind the scenes. I had to make the bushes and pins on the lathe and that takes time, combined with the fact that work is a bit busy plus there are always other chores to be done around the house, really I think I didn't do too badly for the week. |
|||||||||||||||||
| Slow progress because work is quite busy and unfortunately I need to earn money to support my welding habit. I did get the main hydraulic rams cut and rewelded ready for mounting. Still some more to be done before I can call the arms finished but progress is progress. | In this episode I am still mounting the arms on the tractor, fitting the hydraulic rams and quick attach units so that I can make sure everything functions as intended before I weld it all up. | |||||||||||||||||
| In this episode I am still putting the finishing touches on the arms. I had thought I would finish them in this episode but it seems that everything about this job takes longer than I anticipate. In this episode I have decided to show both some failed ideas and the ones that were eventually successful. I don't know how many might want to emulate this project but I hope showing the failed ideas as well as the successful ones will help anyone who does decide to. | In this episode I finish off the quick attach fittings on the arms, mount the hydraulic rams and start to run the hydraulic lines. | |||||||||||||||||
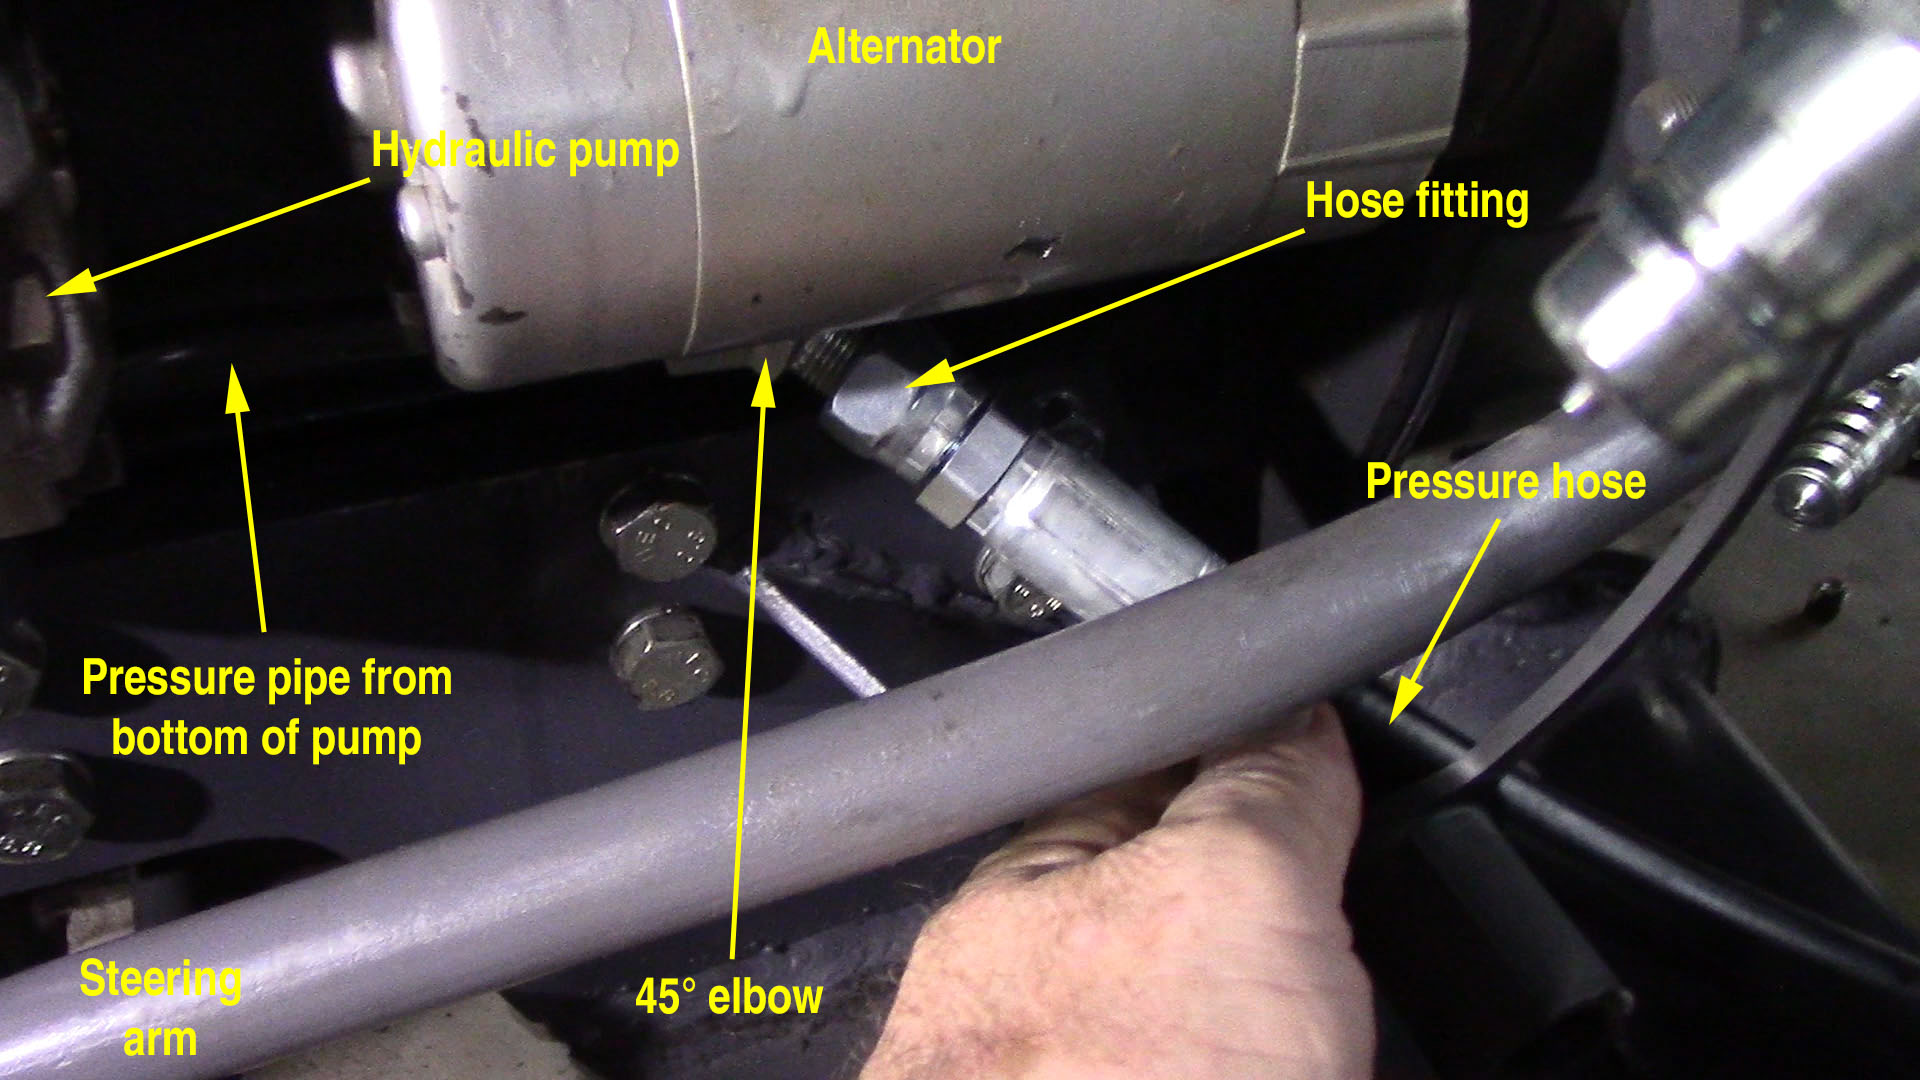
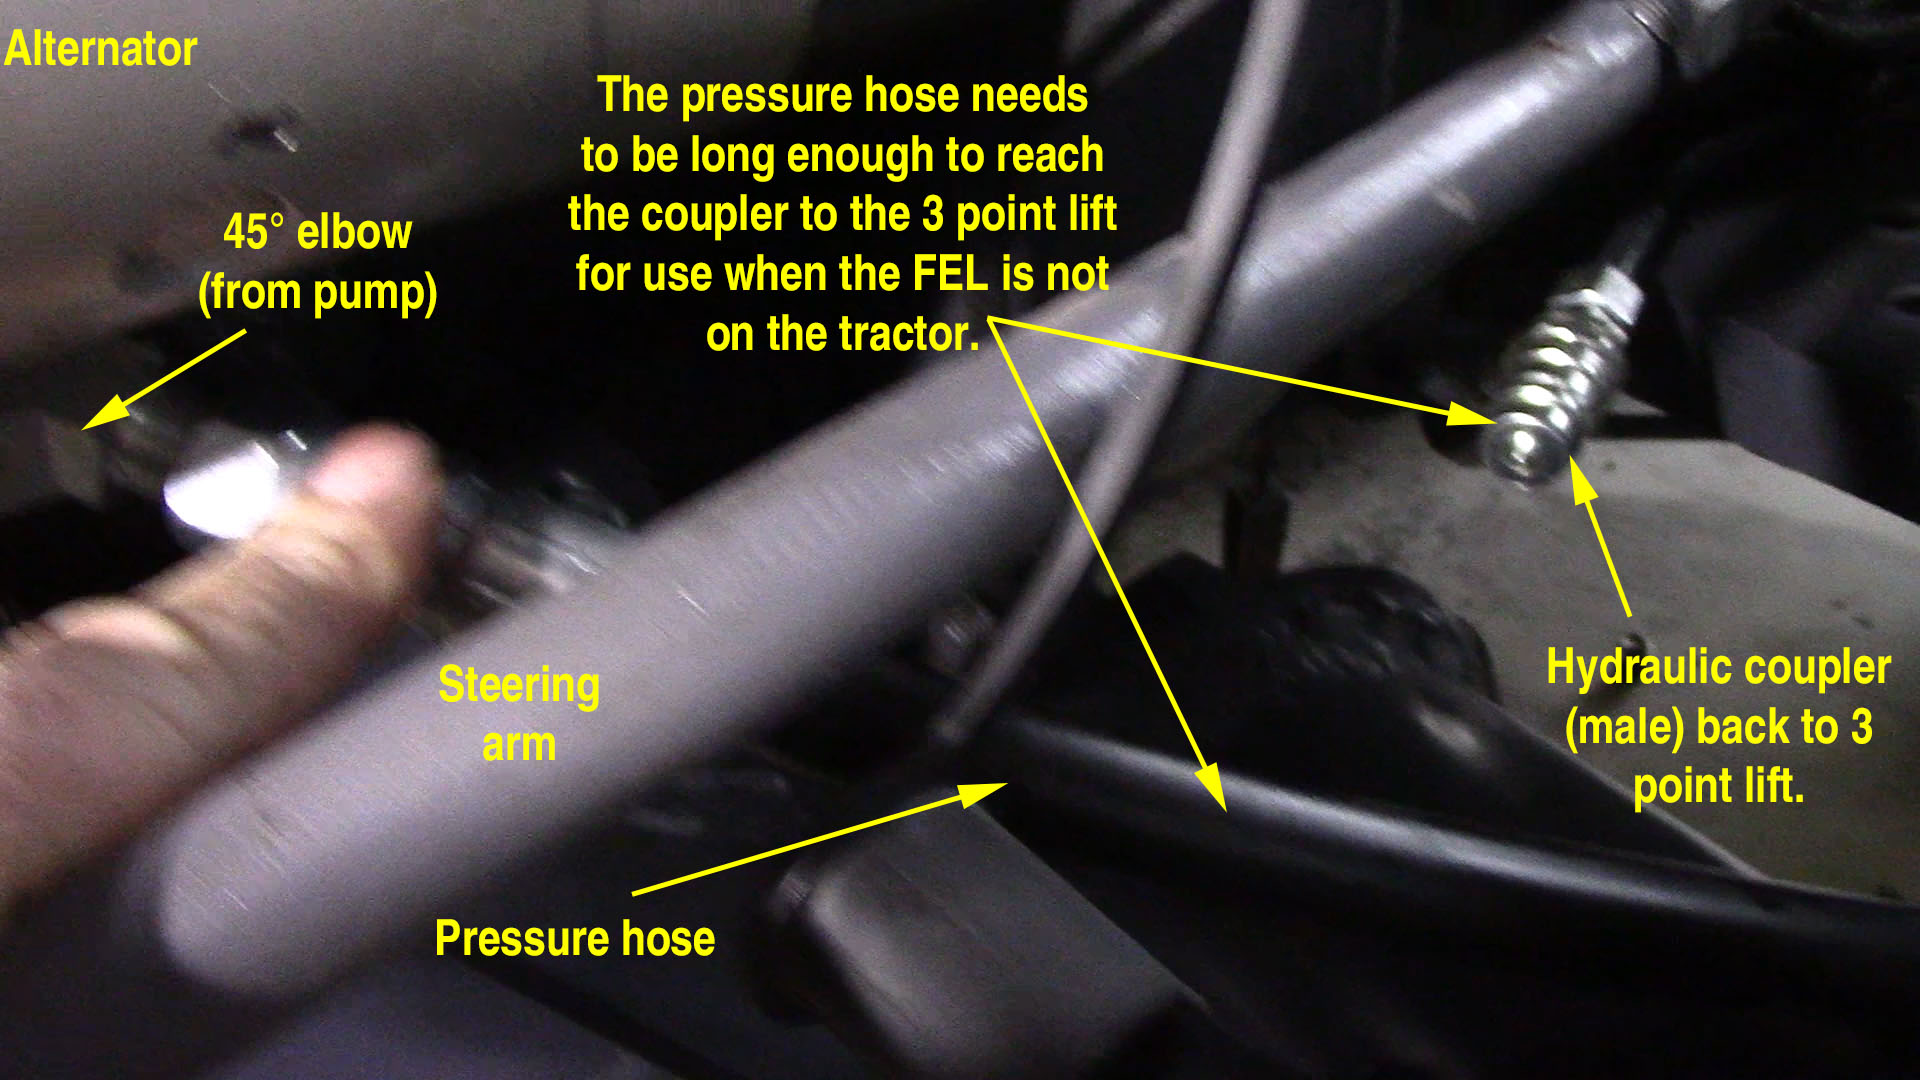
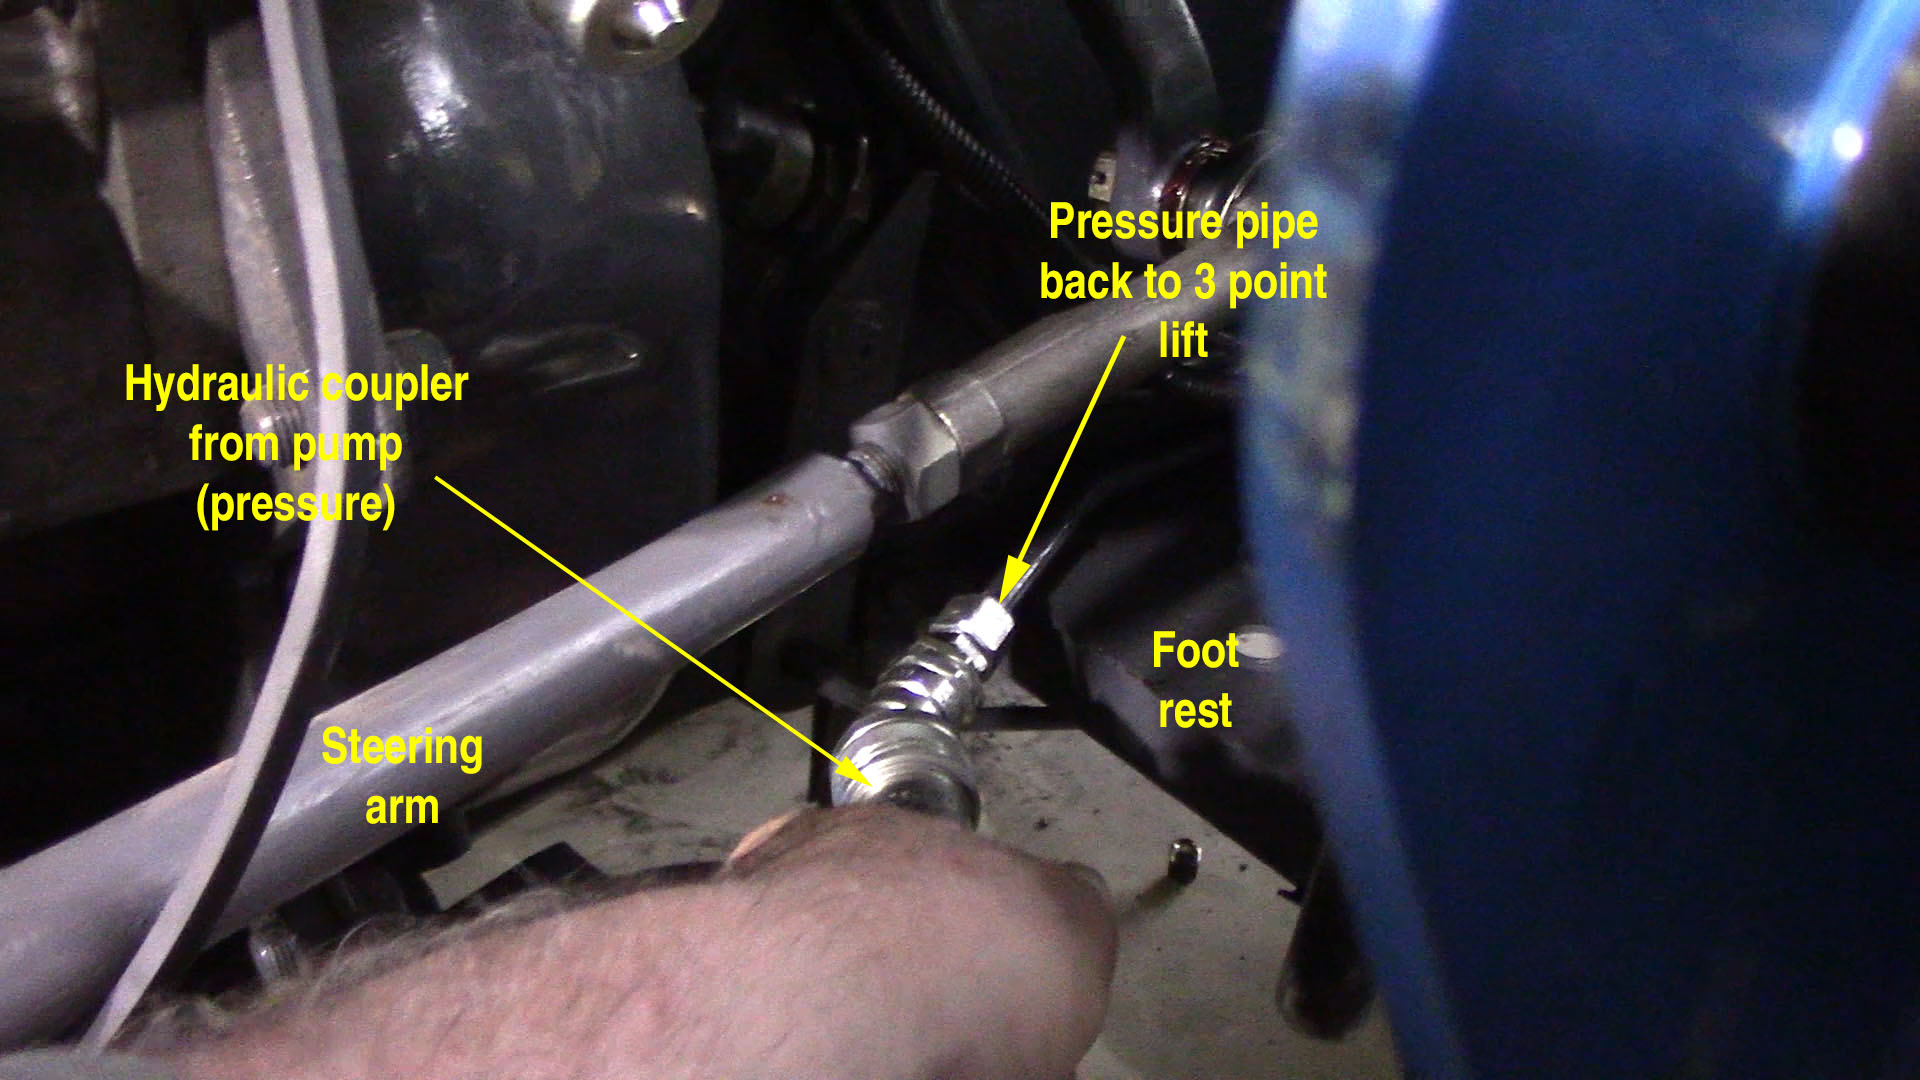
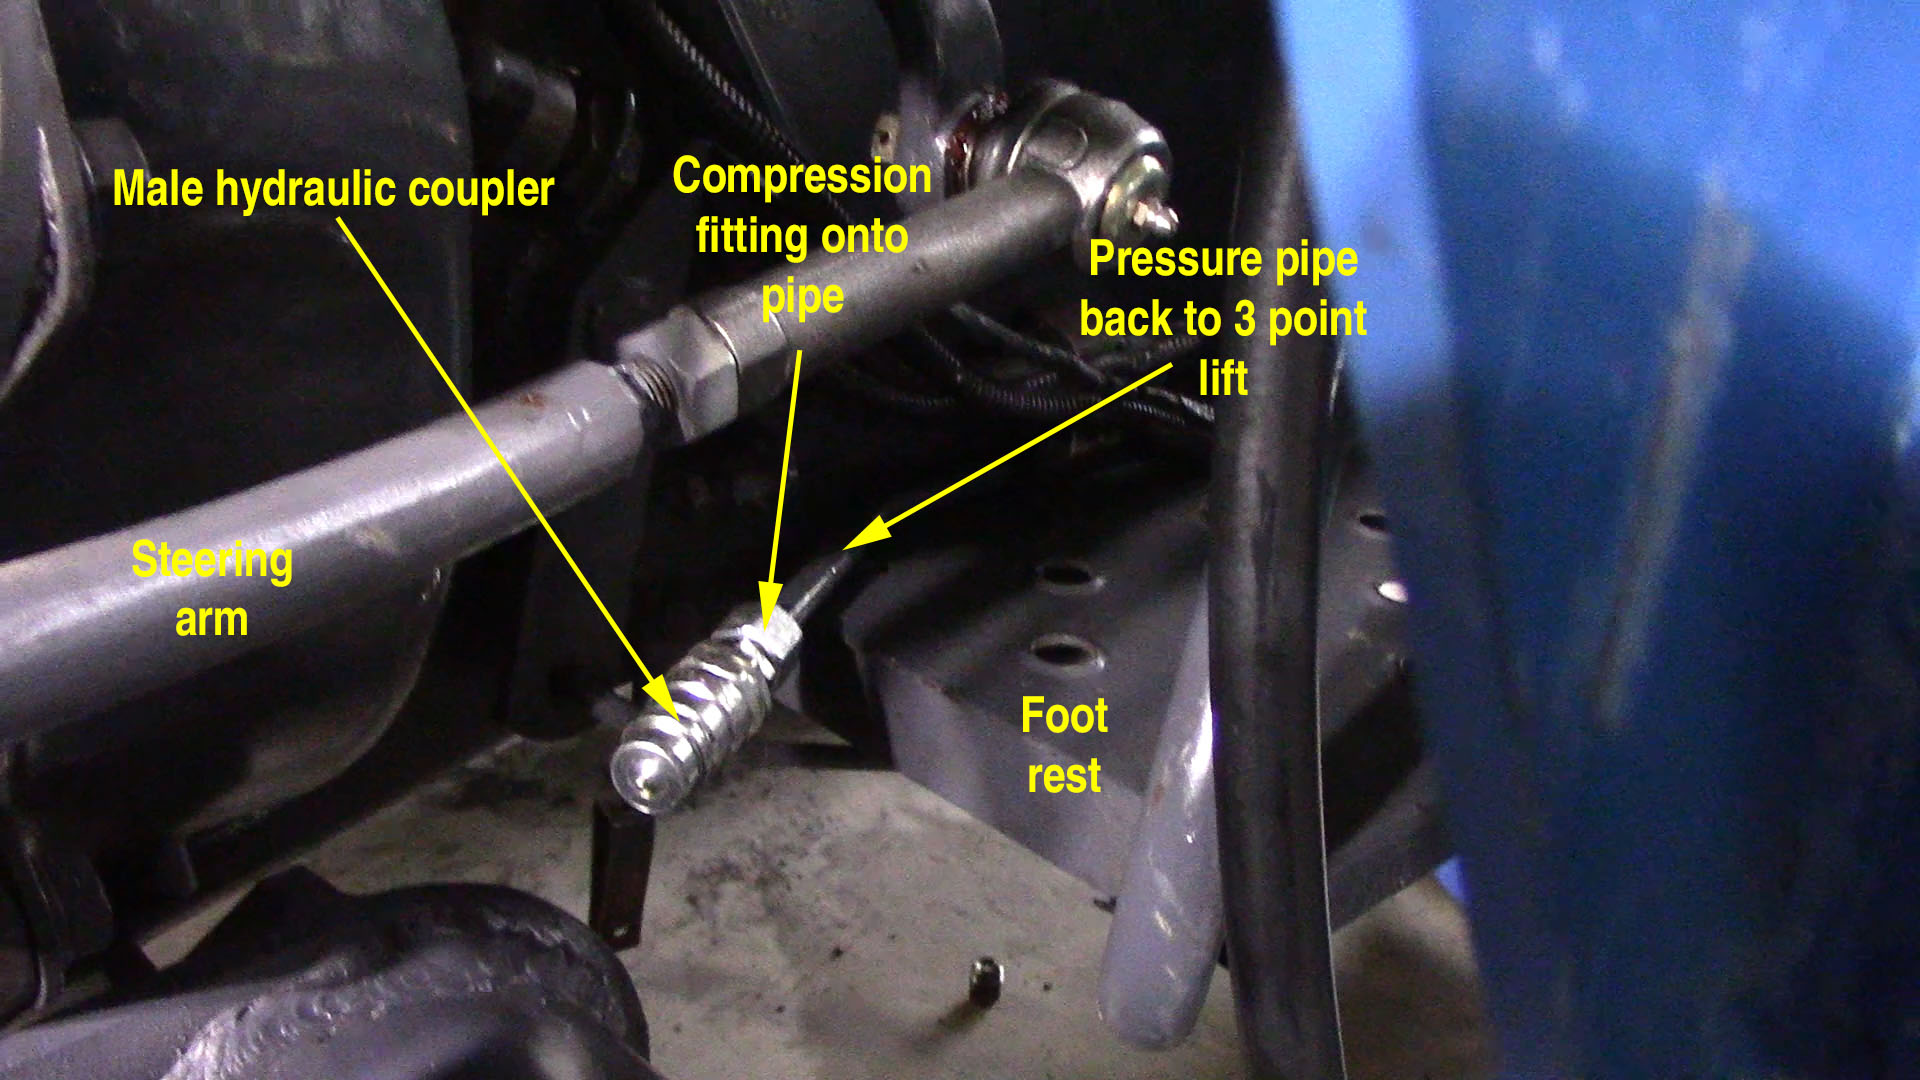
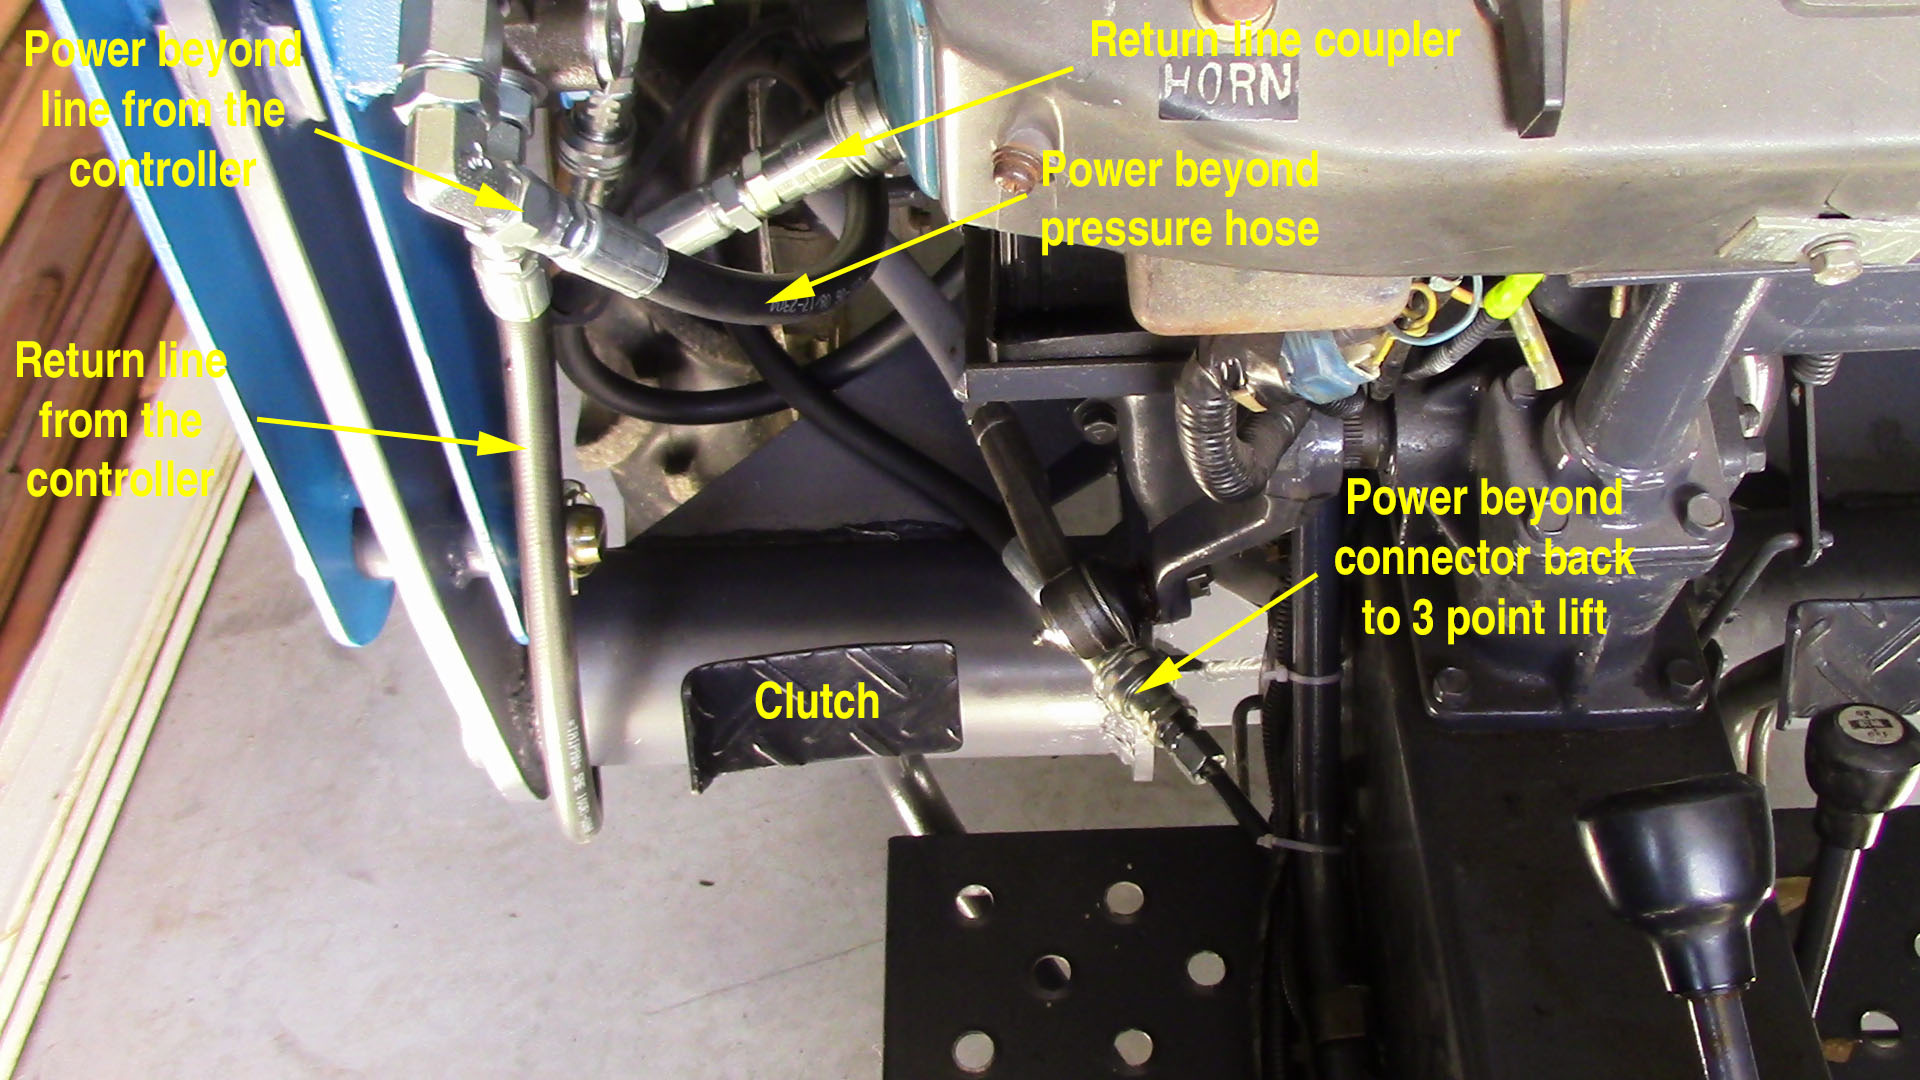
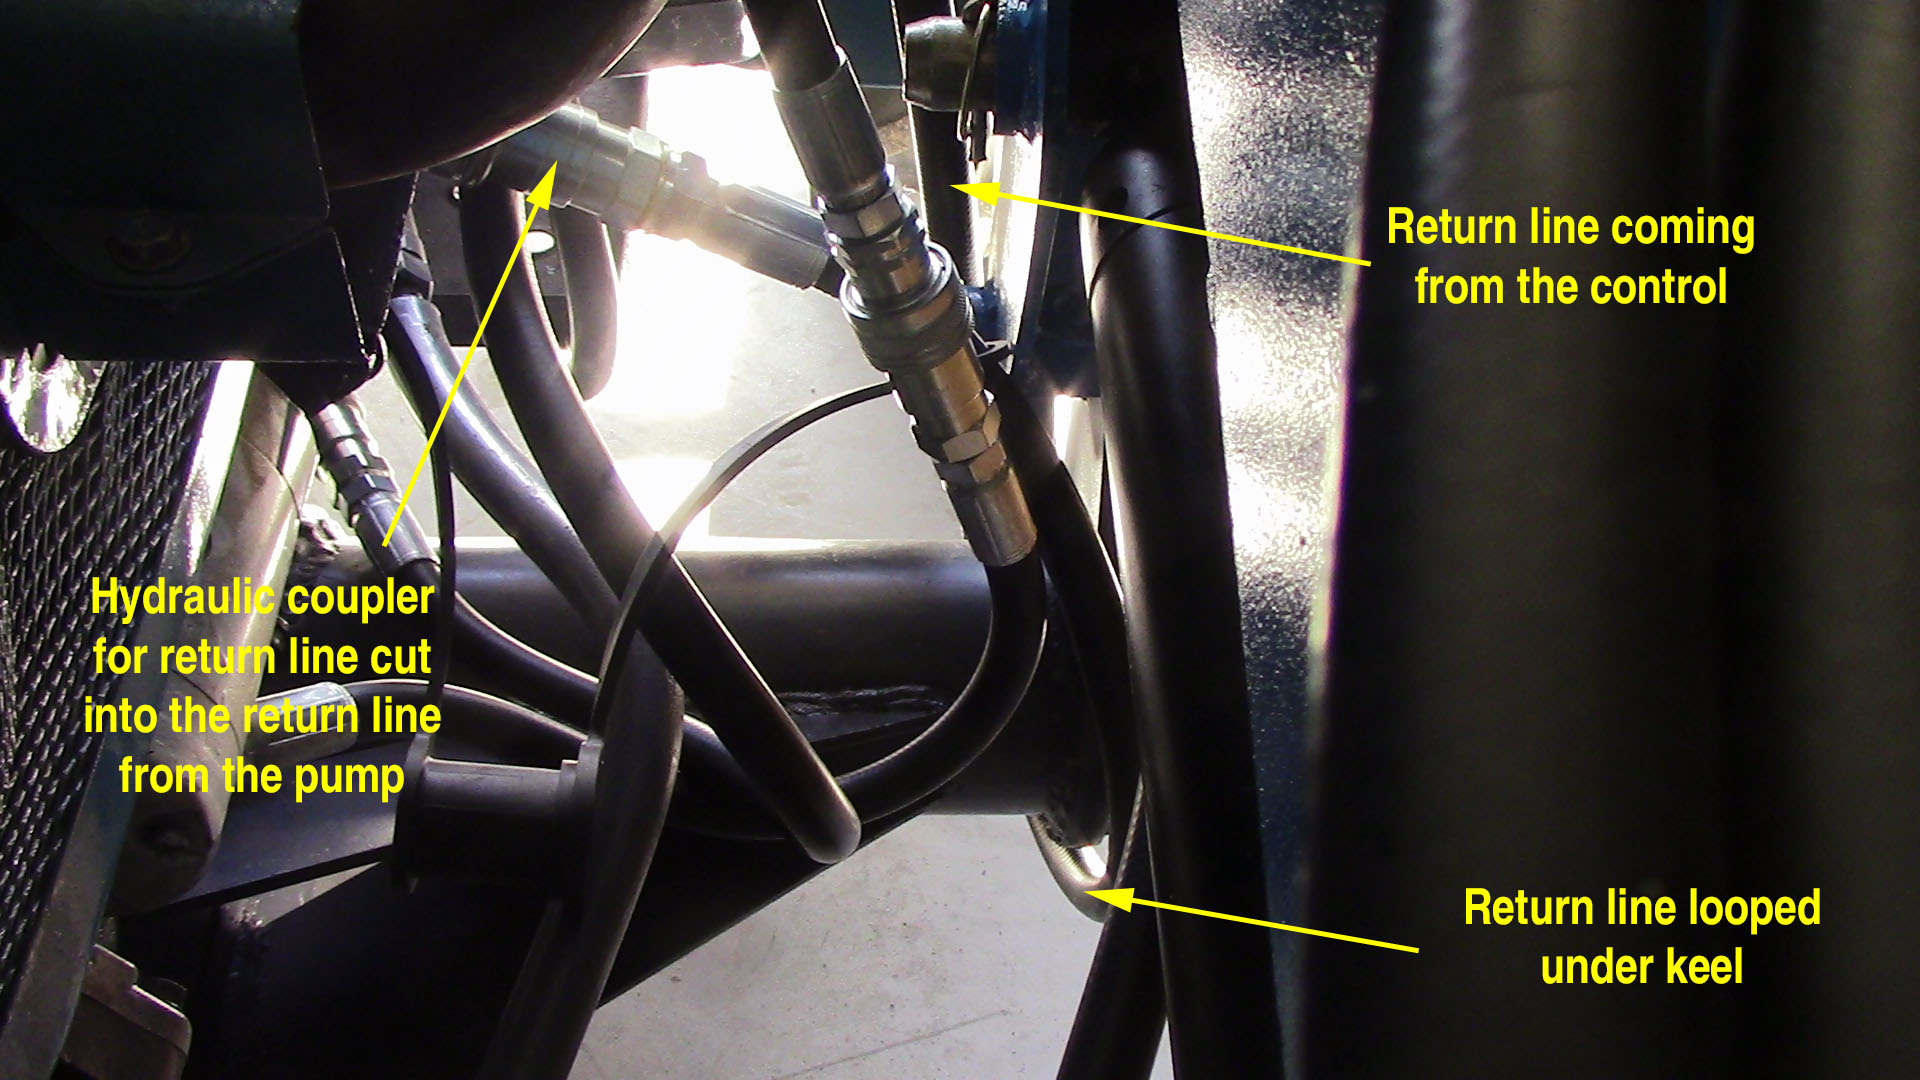
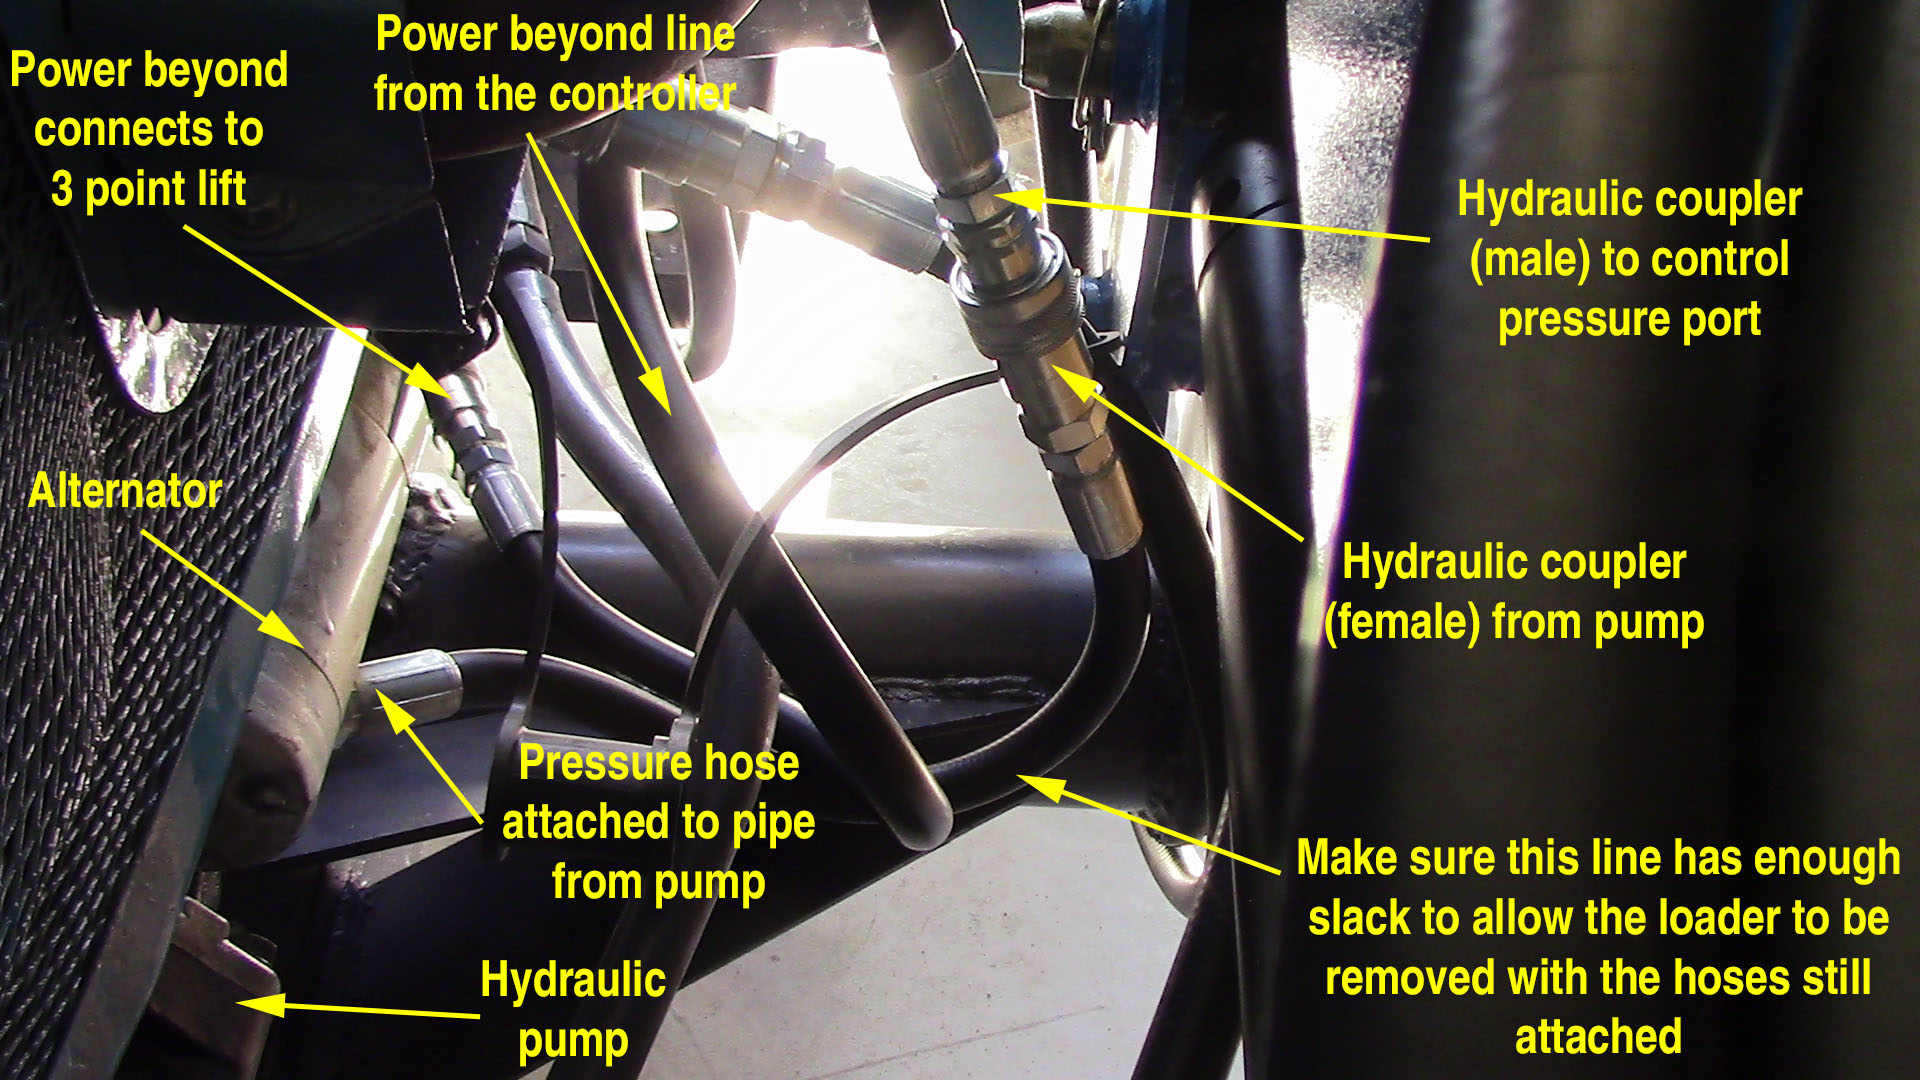
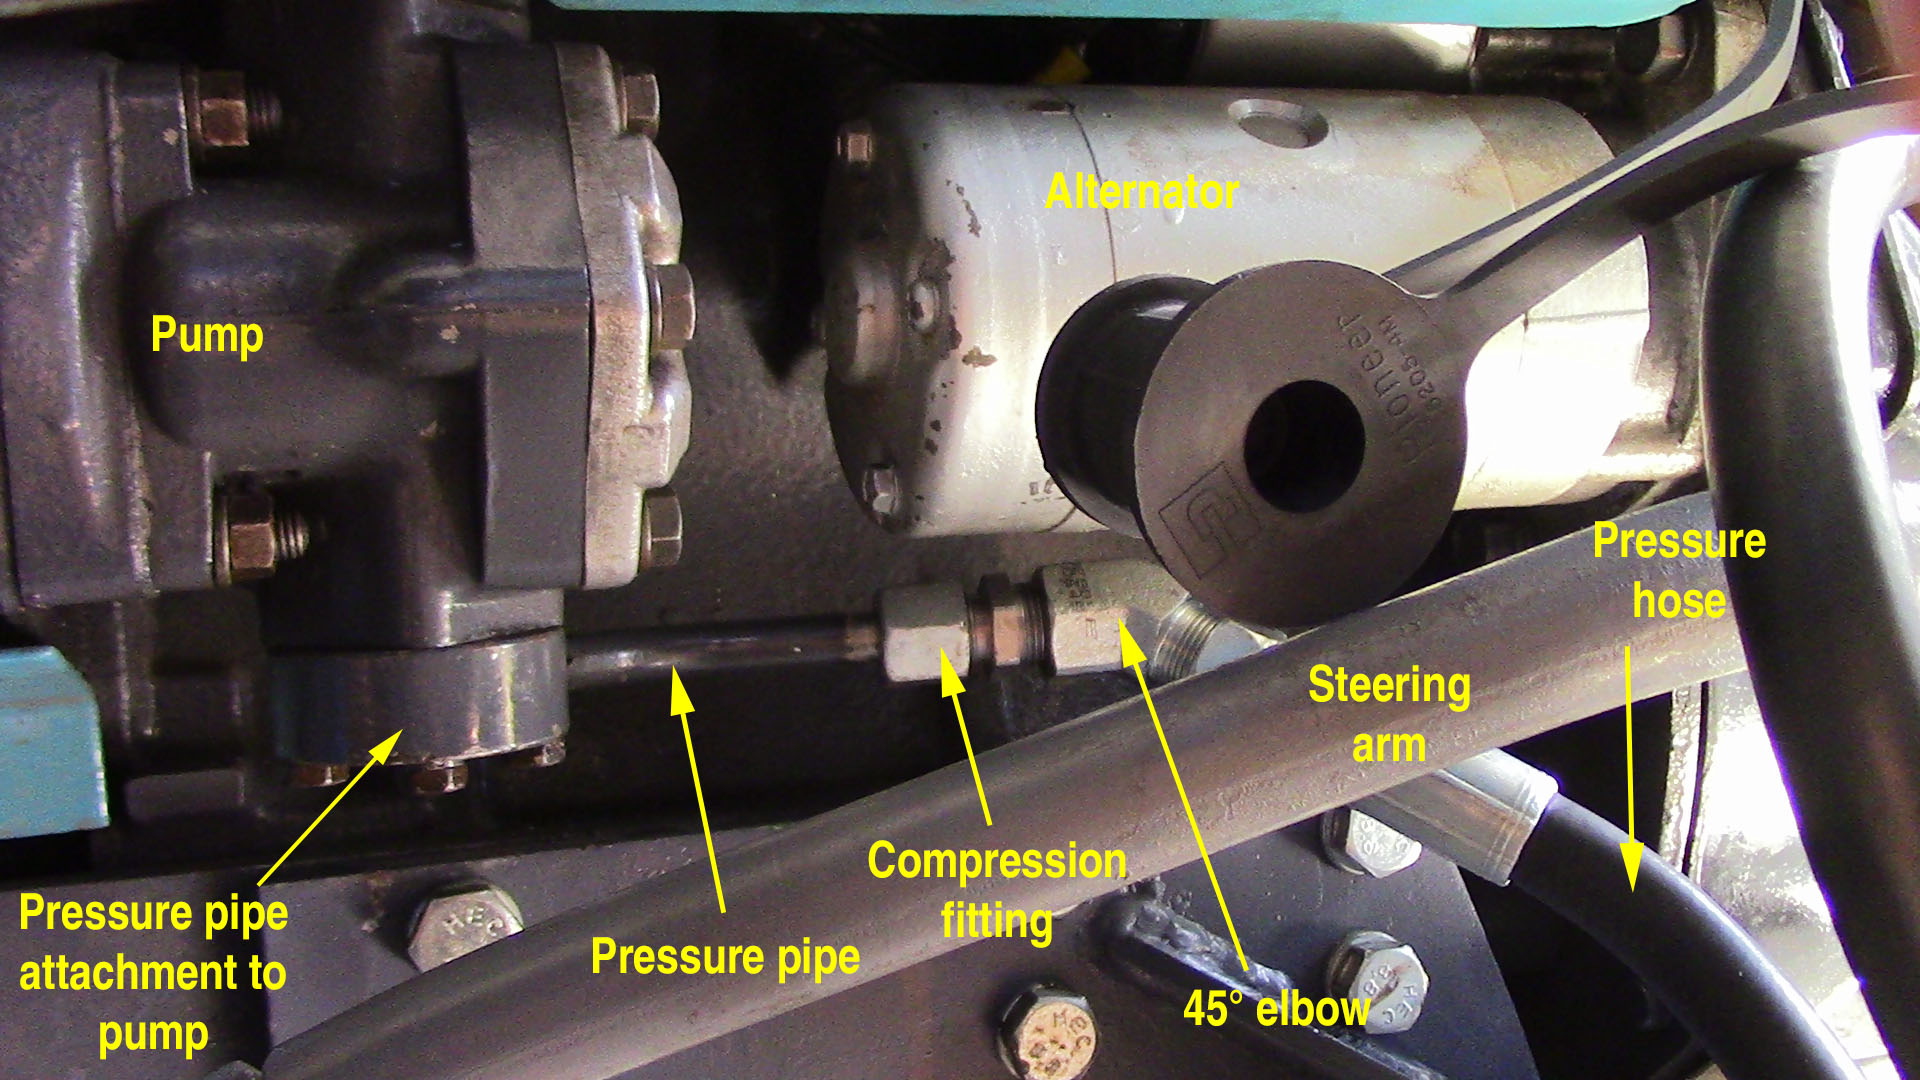
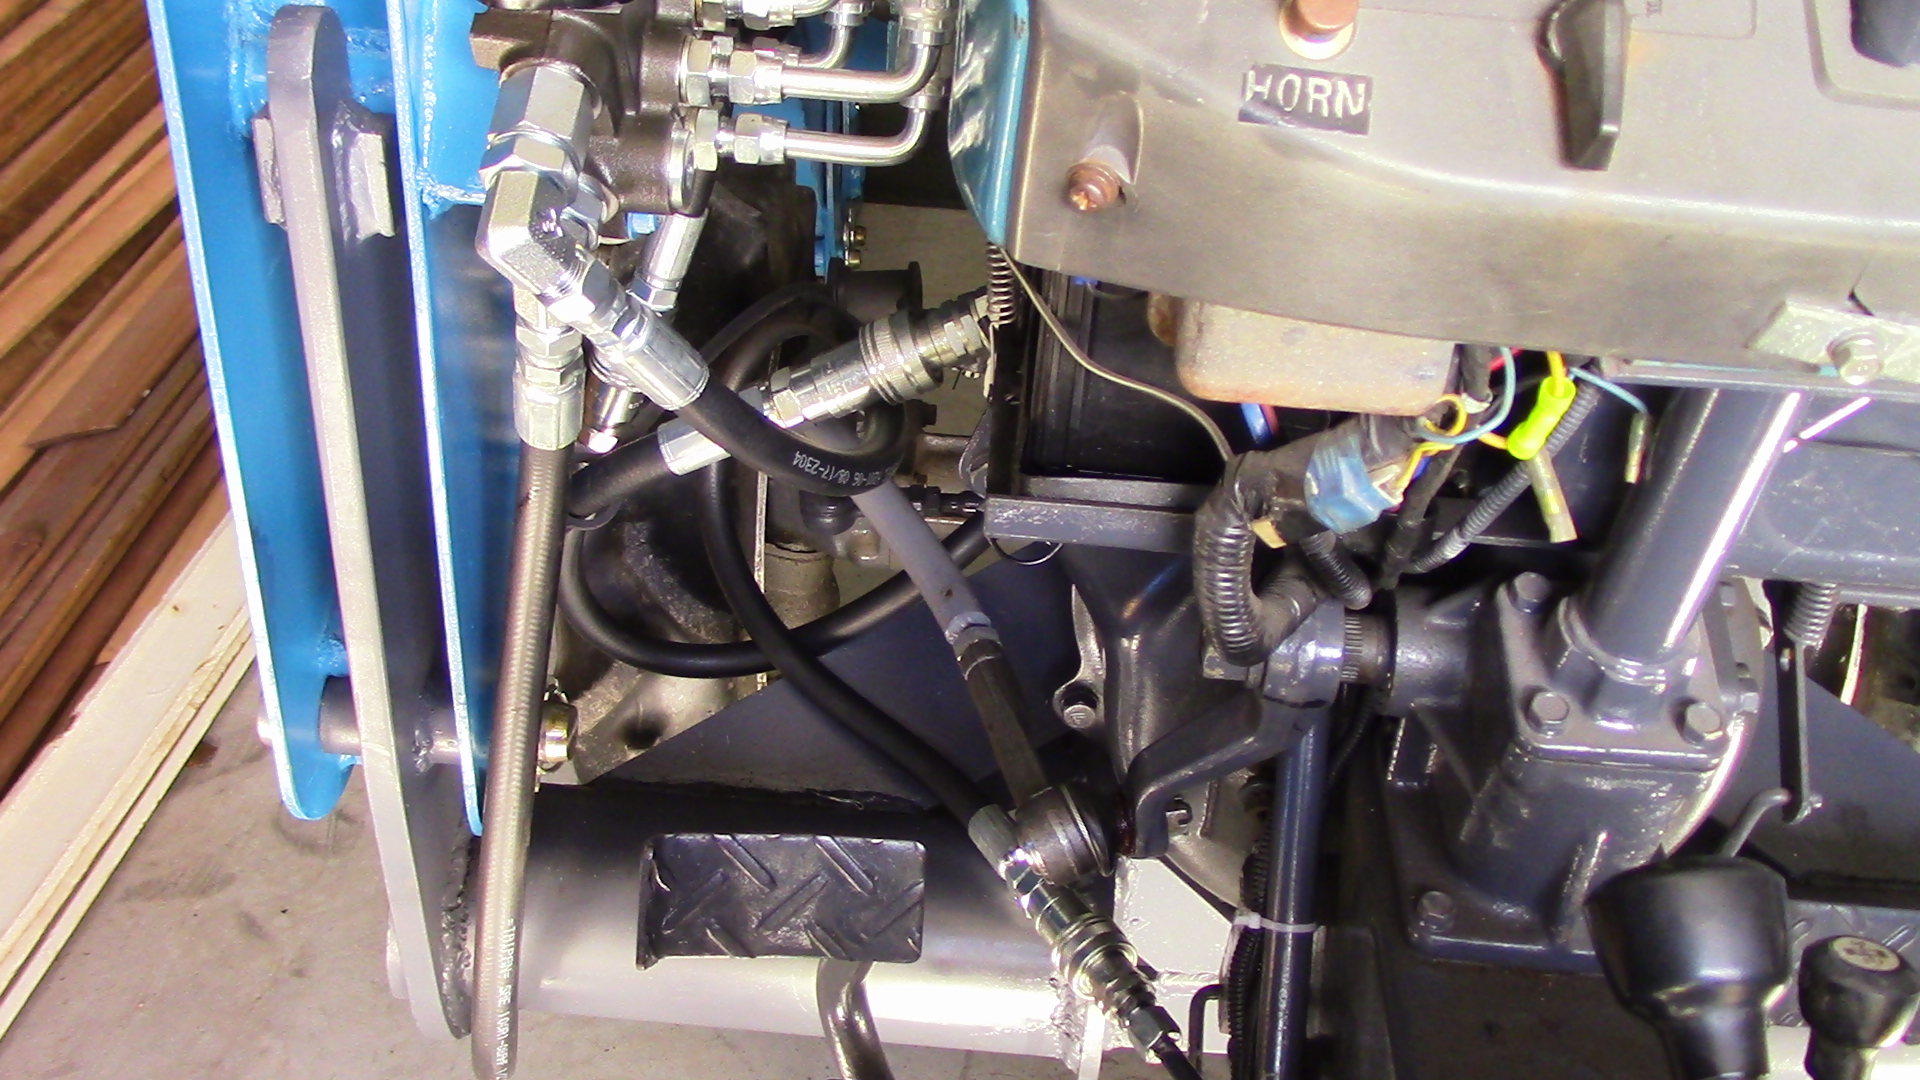
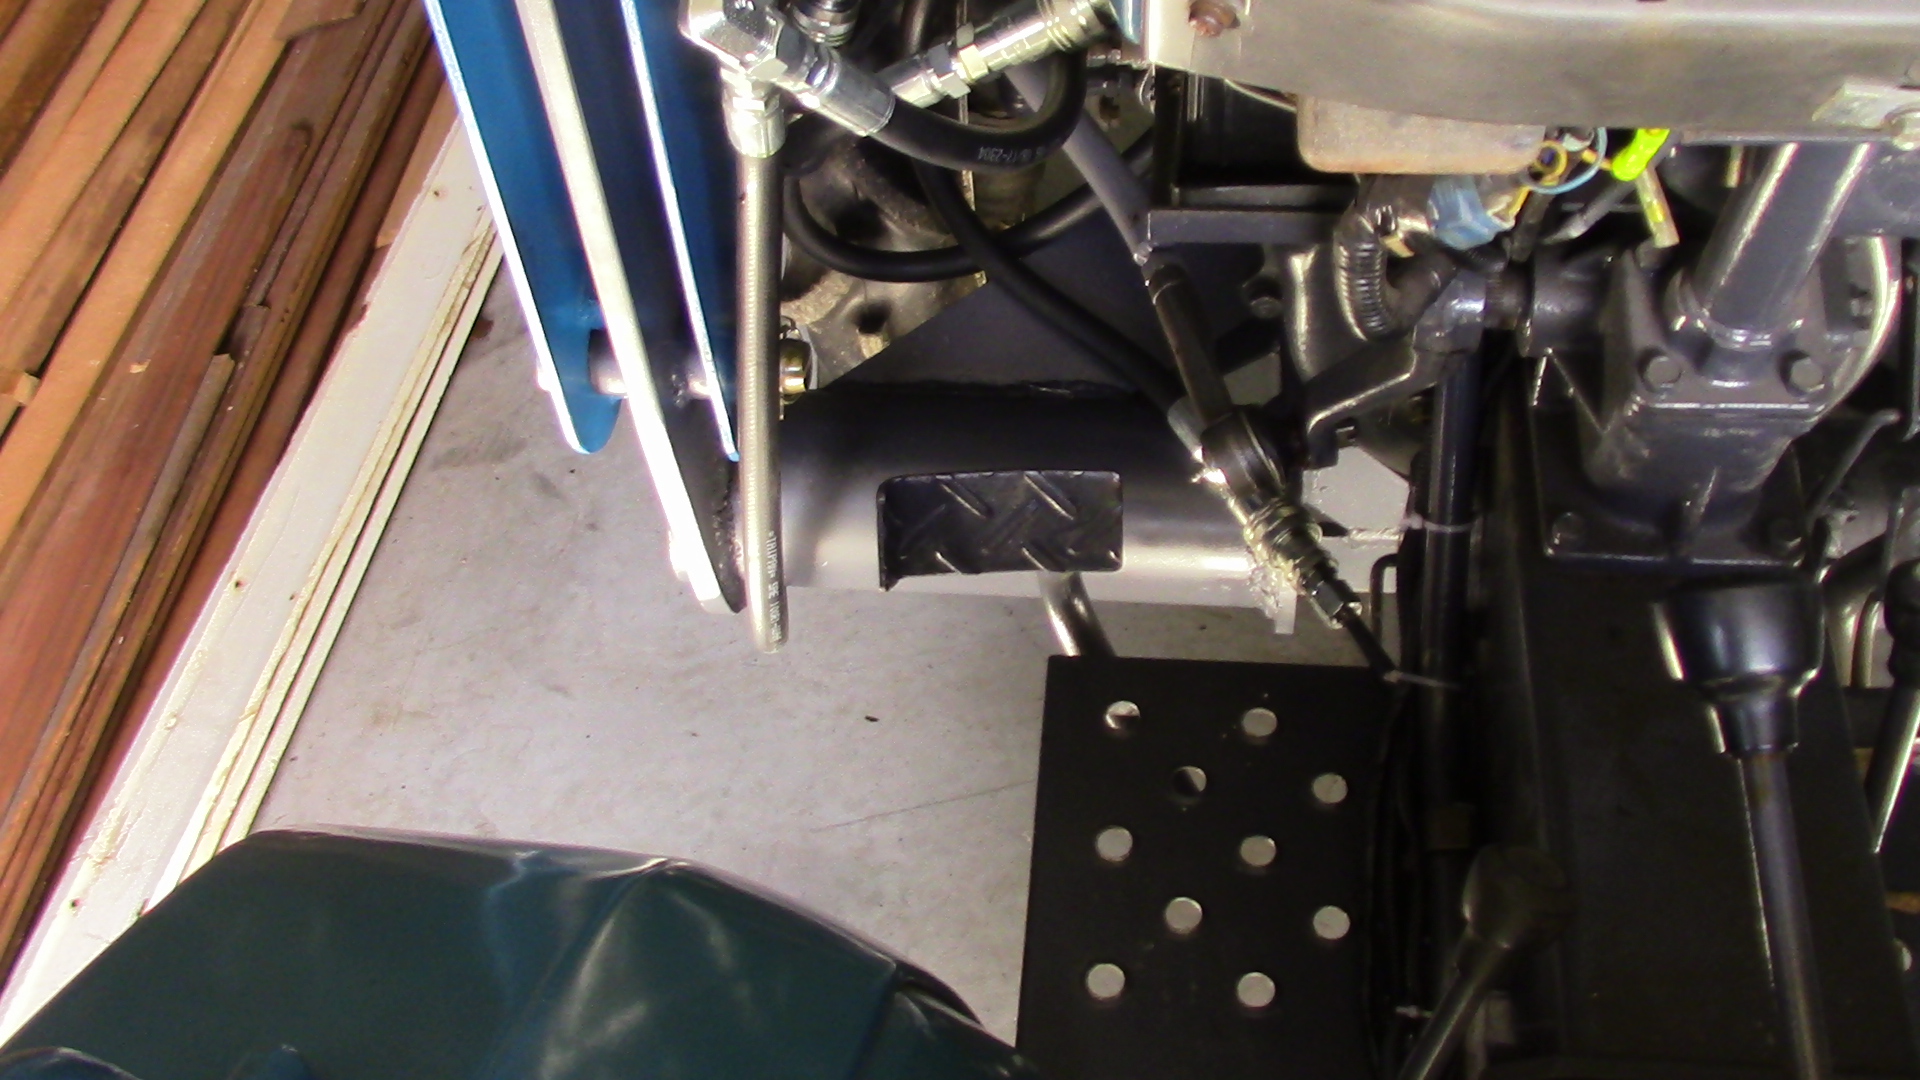
| In this episode I get the arms painted and assembled, mount the hydraulic rams and the tractor end of the quick attach fitting. I complete enough of the hydraulics to enable me to bleed the system and run some rudimentary tests. | In this episode I finish the hydraulics. The tractor side of the project is finally complete. There are some stills linked below which attempt to explain the hydraulic connections a little better in case it wasn't clear in the video. | |||||||||||||||||
| In this episode I finish bucket side of the quick attach fittings. That complete the build with the exception of stands for removing the loader, I intend to leave them for a later video. | In this episovde I put the front end loader through its paces and discuss aspects of the build that I think I could have done better. | |||||||||||||||||
| Some still images that may help you get a better understanding of how I plumbed the hydraulics into the tractor. You can also have a look at my Hydraulic Line Reroute page where I show the initial cutting of the high pressure pipe. | ||||||||||||||||||
|
||||||||||||||||||
| This video has been put together by someone else but I found it to be an excellent explanation of how "power beyond" works. | ||||||||||||||||||
| Download the PDF plans for the Front End Loader here: p0099-A3.PDF | ||||||||||||||||||
| Download the PDF plans for the Loader Bucket here: p0098-A3.PDF | ||||||||||||||||||
| Download the PDF plans for the Bucket Quick Attach here: p0097-A3.PDF | ||||||||||||||||||